| Using HomeSite |
|
|
Chapter 4 Learning HTML and CSS |
|
Now we're ready to get to work on our page.
A picture of the toolbutton used for each procedure is shown below the procedure step. Menu commands and shortcut keys are listed for many of the procedures, as well.
Our sample page is for a travel Web site. We want the site to be pleasing to the eye and easy to navigate, so we'll start by adding an attractive page background and then select a complementary color for the text.
| To add Body content: |
<BODY> tag and select Edit Tag from the menu to open the Body dialog box.


The file's name is inserted in the Background Image text box. Images are separate graphics files (usually with the gif or jpg extension) inserted into HTML documents. They can fill an entire page or be sized to fit just a portion of a page.
The resulting HTML code looks like this:
<!DOCTYPE HTML PUBLIC "-//W3C//DTD HTML 4.0 Transitional//EN">

<HTML>
HEAD>
    <TITLE>Archaeology Tours</TITLE>
</HEAD>

<BODY BACKGROUND="image1.jpg" TEXT="Navy">

</BODY>
</HTML>
The paragraph <P></P> tag is the most basic text container. Paragraphs appear in the browser with a blank line before them. Text inside paragraphs can be aligned to the left, center, or right.
| To add a paragraph and enter text: |
<BODY> tag line.
Click the Paragraph button on the Common QuickBar or press Shift+Ctrl+P to
insert a paragraph tag. The <P> tag does not require a closing tag, but you can check
the Include closing </P> tag option in the Settings > HTML pane (F8) if you want
one inserted.

<P> tag.

Let's make HomeSite stand out a bit in that sentence.
You can wrap a single character, a word, or a text block in the <B> tag to highlight it on the page.
| To add bold formatting: |

That's better!

Next, you'll create a link from this paragraph to the Allaire Corporation's Web site.
Hyperlinks, or links, are the heart of the World Wide Web. They enable you to move from page to page with the click of a mouse and they provide the connections between Web pages and other resources.
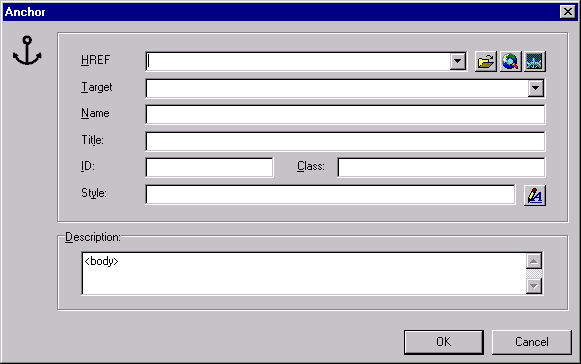
Links are created with the Anchor <A></A> tag and require the HREF attribute, which specifies the target page to which you are linking. Links are usually identified on a page by special link text formatting, such as a distinct color or underlining. Many sites also use images that are coded with the Anchor tag.
| To insert a hyperlink: |


The line should now look like this:
<P>This page was created with <B>HomeSite</B>, which you can find at
<A HREF="http://www.allaire.com">Allaire's Web site</A>.</P>
We used an image file for the page background. Now we will place an image on the page by coding the <IMG> tag. Several attributes are available for the <IMG> tag, but only one is required, SRC, which specifies the image file path. The <IMG> tag doesn't require an end tag.
<IMG SRC="images/myimage.gif">
By default, an image is treated as an inline image, that is, the browser renders it as if it were a character in the line of text. The bottom of the image is aligned with the base of the line, and the image's position within the text will remain the same regardless of how the browser wraps the lines. You can set images off by themselves by placing them in separate paragraphs or table cells.
| Note | The image's source file is unaffected by changes made to an image's attributes in HomeSite. |
| To insert the Greek Column image: |


The greekcolumn.gif file name is entered in the Source box.
This ensures that a text description of the image appears on the page if the image cannot be rendered.
This attribute forces the text to the left of the image.
The tag should look like this, although the WIDTH and HEIGHT values may differ:
    <IMG SRC="greekcolumn.gif" WIDTH=111 HEIGHT=187 BORDER=0
    ALIGN="RIGHT" ALT="Greek Column">
The next text in the page is a heading. HTML allows six levels of headings, ranging from <H1>, which produces the largest font, to <H6>, the smallest. Heading tags can contain formatting attributes, but we'll just accept the browser default for this one.
| To insert the Archaeology Tours heading: |

The tag should look like this:
<H1>Archaeology Tours</H1>
Let's add a visual element to separate the heading from the next section. We'll accomplish this by adding a horizontal rule.
| To add a horizontal rule: |
<HR> editor.


The code looks like this:
<HR WIDTH="80%" COLOR="Black" NOSHADE>